
In this post, we will talk about the process of creating database backups and restoring them using phpMyAdmin, a widely used web-based database management tool.
Table of Contents:
- Database Backup
- Database Restoration
- Conclusion
Step 1: Accessing phpMyAdmin
Access phpMyAdmin. Usually, it is accessible via your web hosting control panel, such as cPanel or Plesk.
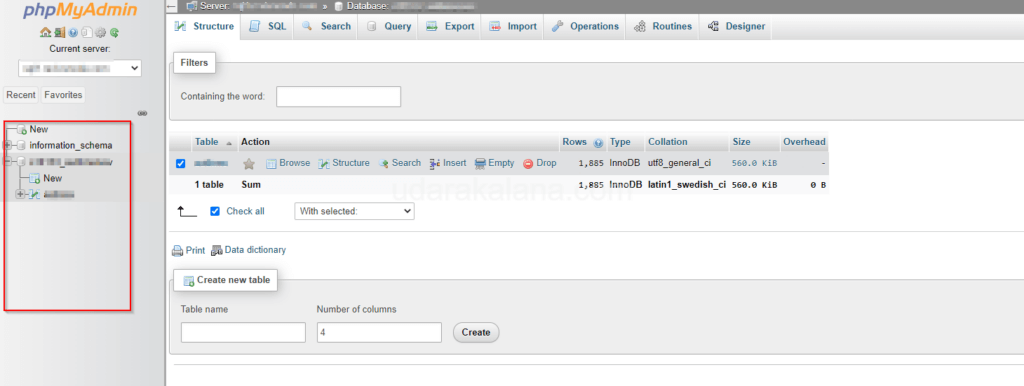
Step 2: Selecting the Database
Advertisements
Select the database you wish to back up and click on its name to select it.
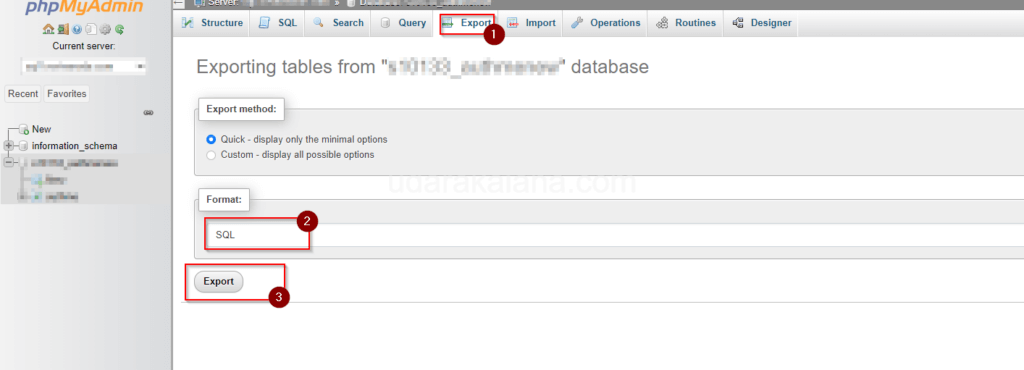
Step 3: Export Feature
You will be redirected to the main interface of the chosen database. Look for the “Export” tab located at the top of the page and click on it. This tab is where you can configure and start the backup process.
Step 4: Choosing Backup Options
On the “Export” page, you will find options to customize your backup. These options include selecting specific tables, choosing the export method (quick or custom), and selecting the format of the backup file (e.g., SQL, CSV, XML). For a standard backup, the default settings are usually sufficient.
Step 5: Start the Backup
Once you have selected the options, click the “Export” button. This action will start the backup process, and depending on the size of your database, it may take a few moments to complete. phpMyAdmin will generate a backup file with data.
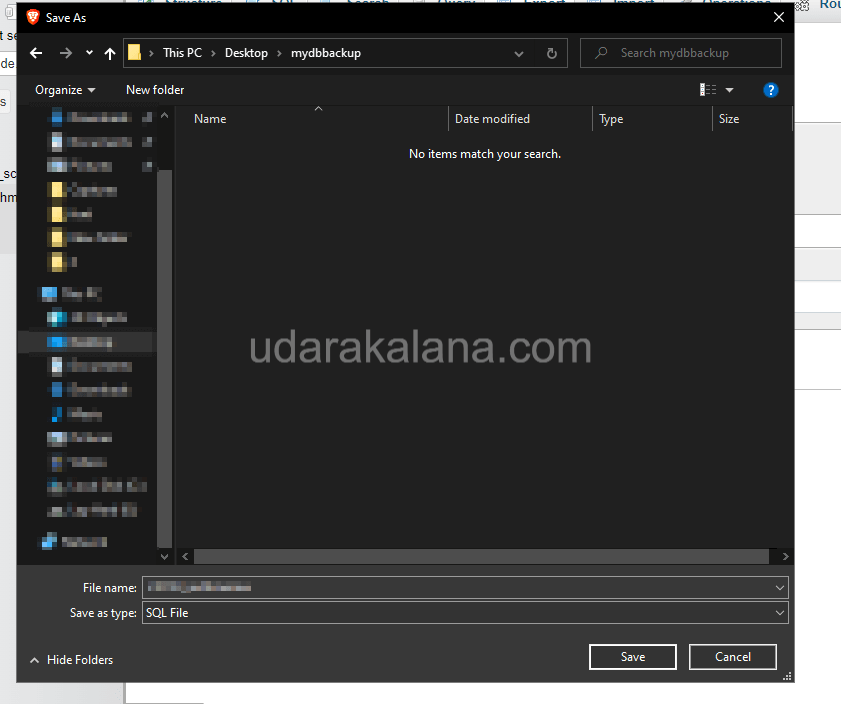
Step 6: Downloading the Backup File
Choose a location on your local machine where you want to save the backup file.
Database Restoration
Step 1: Accessing phpMyAdmin
To restore a database backup using phpMyAdmin, you need to access the application using the same steps as described earlier.
Step 2: Selecting the Database
Once inside phpMyAdmin, select the database where you want to restore the backup from the list of available databases.
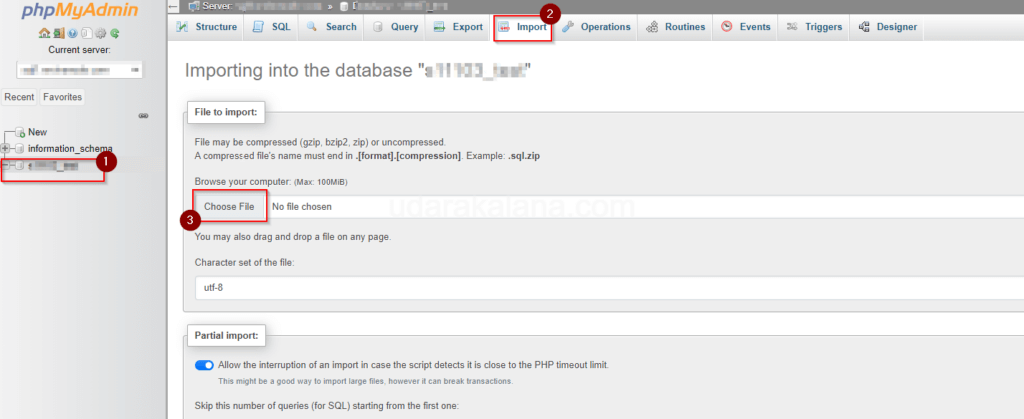
Step 3: Import Feature
After selecting the database, Look for the “Import” tab located at the top of the page and click on it.
Step 4: Uploading the Backup File
On the “Import” page, you will find a section labelled “File to import.” Click on the “Choose File” button and navigate to the location where you saved the backup file. Select the file and click on the “Open” button.
Step 5: Start the Backup Restore
click on the “Import” button located at the bottom of the page. phpMyAdmin will Start the Restore process.
Step 6: Verifying the Restoration
Advertisements
After the Restore process completes, phpMyAdmin will display a success message.

Conclusion
By following the step-by-step process outlined in this post, you can create backups of your databases using phpMyAdmin and restore them whenever necessary. Remember to store your backup files securely.

