
This post shows you how to generate an SSH key using Putty Keygen and upload it to your Linux server.
Table of Contents:
- Step 1: Generate an SSH Key using PuttyKeygen
- Step 2: Creating a user and giving sudo access
- Step 3: Adding the SSH key to the user
- Step 4: Disabling the default SSH port
- Step 5: Enabling public key authentication and disabling password authentication
- Step 6: Disabling root login
Step 1: Generate an SSH Key using PuttyKeygen
First, we need to create an SSH key. We can do this using Putty Keygen, a free utility that comes with the Putty SSH client.
- Download and install Putty Keygen from the official website.
- Launch Putty Keygen and select RSA as the type of key to generate.
- Set the number of bits in a generated key to 2048 or (4096) higher for better security.
- Click the ‘Generate’ button to generate the SSH key pair.
- Enter a passphrase to protect your private key if you want. (recommended)
- Save the public and private keys to a secure location.
Step 2: Creating a user and giving sudo access
After creating the SSH key, you need to create a user on your Linux server and give it sudo access. To create a user, log in to your server using the root account and run the following command:
adduser <username>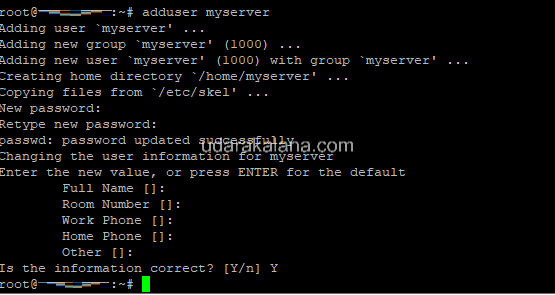
Advertisements
Next, give the new user sudo access by running the following command:
usermod -aG sudo <username>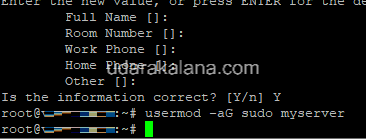
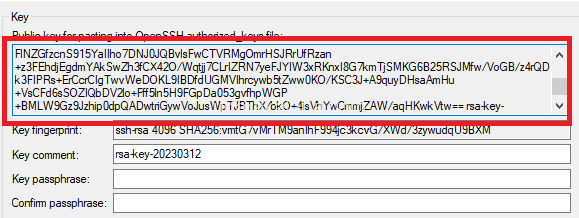
Step 3: Adding the SSH key to the user
Once you have created the user and given it sudo access, you need to add the SSH key to the user’s authorized_keys file. To do this, log in to your server using the new user account and run the following commands (to change the user type this command: login newusername and password):

mkdir ~/.ssh
chmod 700 ~/.ssh
nano ~/.ssh/authorized_keys
This will open the authorized_keys file in the nano text editor. Copy and paste the public key generated by Putty Keygen into this file, save the changes, and exit. (CTRL+X to save the file) ‘ to paste in putty you have to right-click ‘
Step 4: Disabling the default SSH port
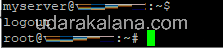
Switch back to the root user by ctrl+d
To increase the security of your server, it is recommended that you disable the default SSH port (22) and use a different port number. To do this, edit the SSH configuration:
sudo nano /etc/ssh/sshd_config if you get an error like this ‘-bash: sudo: command not found‘ remove the sudo and enter the command ‘nano /etc/ssh/sshd_config‘
Find the line that says “#Port 22” and change it to a different port number, for example:
Port 2222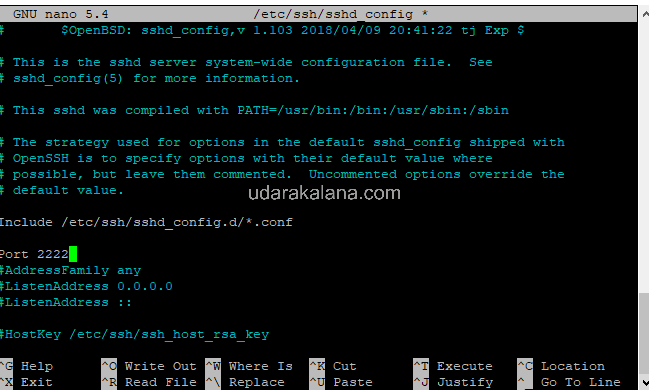
you can use any number between 49152 and 65535.
Step 5: Enabling public key authentication and disabling password authentication
you should disable password authentication and enable public key authentication. To do this, find the following lines in the sshd_config file:
#PasswordAuthentication yes
#PubkeyAuthentication yes
Remove the “#” symbol from the beginning of the “PubkeyAuthentication” line, and change the “PasswordAuthentication” line to “no”:
PasswordAuthentication no
PubkeyAuthentication yes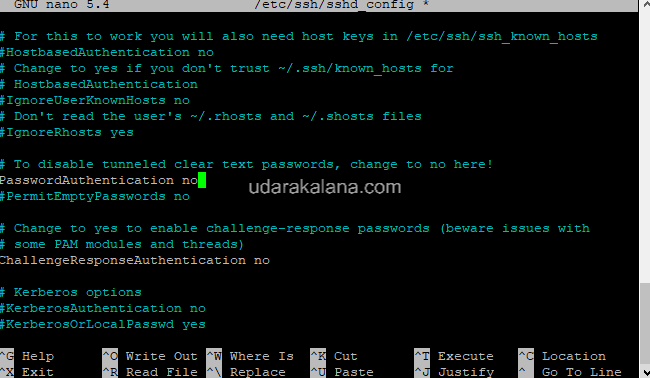

Step 6: Disabling root login
disable root login via SSH. To do this, find the following line in the sshd_config file:
#PermitRootLogin yesChange it to:
PermitRootLogin no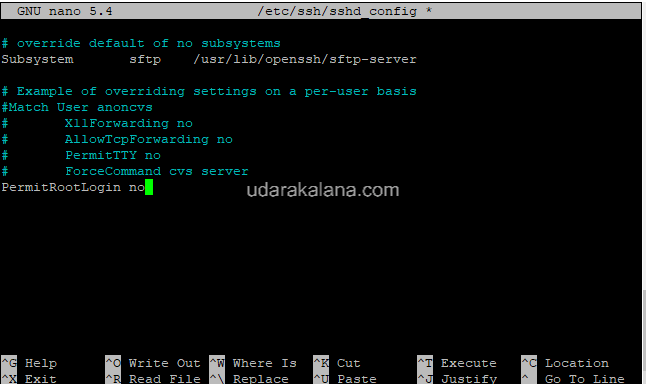
Save the changes and exit. . (CTRL+X to save the file)
Advertisements
After making changes to the sshd_config file, you need to restart the SSH service for the changes to take effect:
sudo systemctl restart sshdThis command will restart the SSH service on your Linux server, which will reload the sshd_config file with the new changes you made, including disabling the default SSH port, enabling public key authentication, and disabling root login. (if the changes not applied after sshd restart try rebooting the server using command : reboot)
That’s it! If you have any questions or comments, feel free to leave them below. And don’t forget to share this post with others who might find it useful!


Hey how do I switch to the root user when I’m in the user
Here’s the syntax for the su command:
su -thanks..