
In this post, I will show you how to install Nextcloud with PHP 8.2 and SSL on a Linux server.
Before you begin, make sure you have the following:
- A Linux server with root access (Ubuntu 22.04 Recommended)
- A domain name or subdomain pointing to the IP address of your server
Table of Contents:
- Step 1: Connect to Your Server
- Step 2: Update and Upgrade Your System
- Step 3: Install Apache Web Server
- Step 4: Install PHP and Required Modules
- Step 5: Install MariaDB Database Server
- Step 6: Secure MariaDB Installation
- Step 7: Create a Virtual Host for Nextcloud
- Step 8: Download and Install Nextcloud
- Step 9: Create a Database for Nextcloud
- Step 10: Configure SSL for Nextcloud
- Step 11: Finish Nextcloud Installation
- Conclusion
Step 1: Connect to Your server
First, connect to your Linux server using SSH.
Step 2: Update and Upgrade Your System
Upgrade your system to the latest packages:
sudo apt update && sudo apt upgrade -yStep 3: Install Apache Web Server
Install the Apache web server, which will serve Nextcloud:
sudo apt install apache2 -yStart the Apache service and enable it to start at boot:
sudo systemctl start apache2
sudo systemctl enable apache2
Step 4: Install PHP and Required Modules
Install PHP and some required modules for Nextcloud to work correctly:
sudo apt install software-properties-common -y
sudo add-apt-repository ppa:ondrej/php
sudo apt update
sudo apt install php8.2 libapache2-mod-php8.2 php8.2-common php8.2-mysql php8.2-xml php8.2-xmlrpc php8.2-curl php8.2-gd php8.2-imagick php8.2-cli php8.2-dev php8.2-imap php8.2-mbstring php8.2-intl php8.2-bcmath php8.2-bz2 php8.2-zip php8.2-pdo-mysql php8.2-posix php8.2-ldap php8.2-smbclient php8.2-ftp php8.2-gmp -yAdvertisements
Configure Apache to use PHP 8.2 as the default PHP version:
sudo a2enmod php8.2
sudo systemctl restart apache2
Step 5: Install MariaDB Database Server
Install MariaDB for Nextcloud.:
sudo apt install mariadb-server -ystart the MariaDB and enable it to start with system boot:
sudo systemctl start mariadb
sudo systemctl enable mariadb
Step 6: Secure MariaDB Installation
sudo mysql_secure_installationFollow the on-screen prompts to remove anonymous users, disallow root login remotely, remove test databases, and reload privilege tables.
Step 7: Create a Virtual Host for Nextcloud
Create a virtual host in Apache for Nextcloud:
sudo nano /etc/apache2/sites-available/nextcloud.confAdd the following configuration to the file:
<VirtualHost *:80>
     ServerAdmin [email protected]
     DocumentRoot /var/www/nextcloud
     ServerName your_domain.com

     <Directory /var/www/nextcloud/>
        Options +FollowSymlinks
        AllowOverride All
        Require all granted
     </Directory>

     ErrorLog ${APACHE_LOG_DIR}/error.log
     CustomLog ${APACHE_LOG_DIR}/access.log combined
</VirtualHost>
Make sure to replace ServerAdmin, ServerName with your_domain.com (for subdomain sub.domain.com) Save and close the file.
Enable the virtual host and restart Apache:
sudo a2ensite nextcloud.conf
sudo systemctl restart apache2
Step 8: Download and Install Nextcloud
Download the latest version of Nextcloud from the official website:
sudo wget https://download.nextcloud.com/server/releases/latest.tar.bz2Extract the downloaded archive to the Apache document root:
sudo tar -xjf latest.tar.bz2 -C /var/www/Change the ownership of the Nextcloud directory to the Apache user and group:
sudo chown -R www-data:www-data /var/www/nextcloudStep 9: Create a Database for Nextcloud
Login to MariaDB as the root user:
sudo mysql -u root -pPress Enter.
Create a new database and user for Nextcloud:
CREATE DATABASE nextcloud;
CREATE USER 'nextclouduser'@'localhost' IDENTIFIED BY 'your_password';
GRANT ALL PRIVILEGES ON nextcloud.* TO 'nextclouduser'@'localhost';
FLUSH PRIVILEGES;
EXIT;
Make sure to replace your_password with a strong password.
Step 10: Configure SSL for Nextcloud
Here’s how you can generate and install a free SSL certificate from Let’s Encrypt using the Certbot tool
Install Certbot:
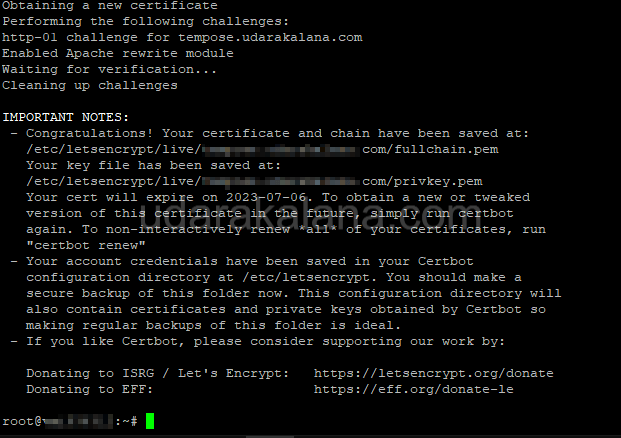
sudo apt install certbot python3-certbot-apacheRun Certbot to generate an SSL certificate for your domain:
sudo certbot certonly --apache -d your_domain.comFollow the on-screen prompts to complete the certificate installation process.
Once the certificate is installed, update the virtual host configuration to use HTTPS. Edit the Nextcloud virtual host file:
sudo nano /etc/apache2/sites-available/nextcloud.confUpdate the virtual host configuration to redirect HTTP requests to HTTPS:
<VirtualHost *:80>
     ServerAdmin admin@your_domain.com
     DocumentRoot /var/www/nextcloud
     ServerName your_domain.com

     <Directory /var/www/nextcloud/>
        Options +FollowSymlinks
        AllowOverride All
        Require all granted
     </Directory>

     ErrorLog ${APACHE_LOG_DIR}/error.log
     CustomLog ${APACHE_LOG_DIR}/access.log combined

     Redirect / https://your_domain.com/
</VirtualHost>

<VirtualHost *:443>
     ServerAdmin admin@your_domain.com
     DocumentRoot /var/www/nextcloud
     ServerName your_domain.com

     <Directory /var/www/nextcloud/>
        Options +FollowSymlinks
        AllowOverride All
        Require all granted
     </Directory>

     ErrorLog ${APACHE_LOG_DIR}/error.log
     CustomLog ${APACHE_LOG_DIR}/access.log combined

     SSLEngine on
     SSLCertificateFile /etc/letsencrypt/live/your_domain.com/fullchain.pem
     SSLCertificateKeyFile /etc/letsencrypt/live/your_domain.com/privkey.pem

     # Add any other SSL configuration settings here

</VirtualHost>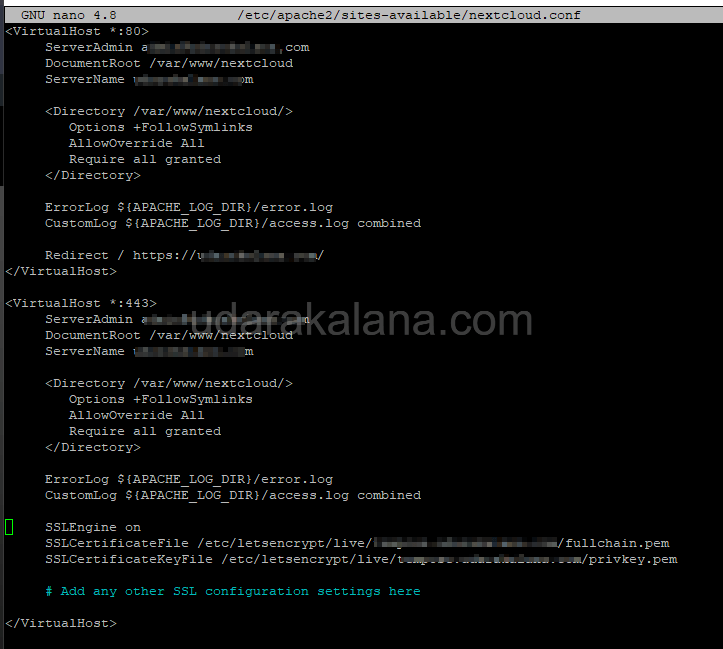
Save and close the file(replace your_domain.com with your domain).
sudo systemctl restart apache2Note: if you get any error like this when restarting with the new nextcloud.conf:
Job for apache2.service failed because the control process exited with error code.
See "systemctl status apache2.service" and "journalctl -xeu apache2.service" for details.
Run this command:
sudo a2enmod ssl
sudo systemctl restart apache2
Step 11: Finish Nextcloud Installation
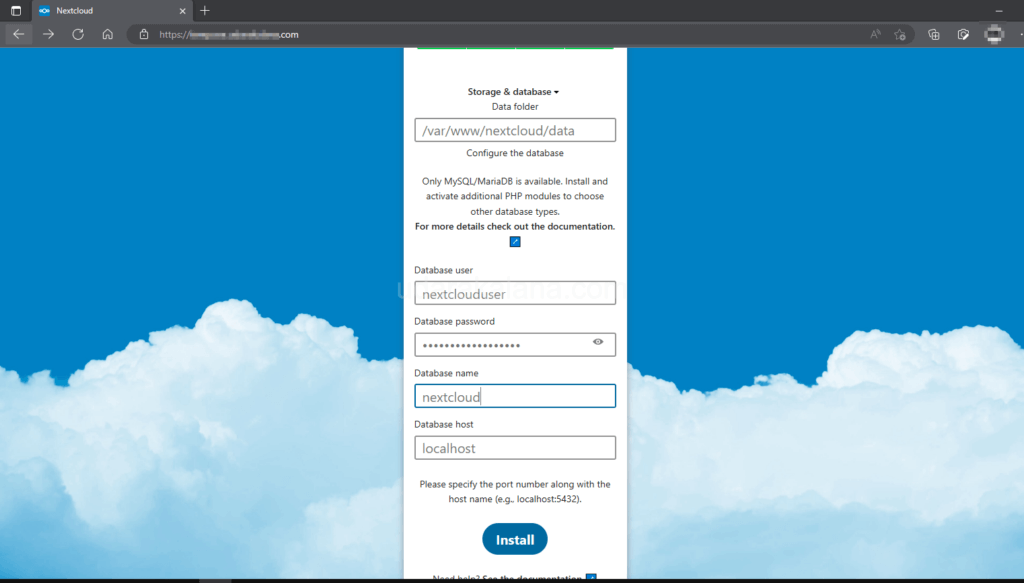
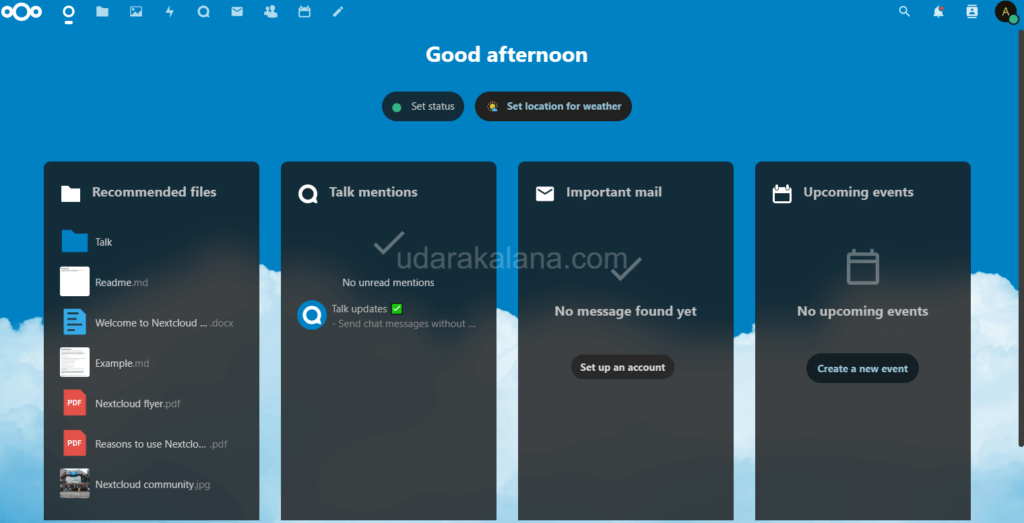
Open a web browser and navigate to your Nextcloud domain using HTTPS (e.g., https://your_domain.com/). You should see the Nextcloud setup page.
Advertisements
Complete the Nextcloud installation. When prompted for the database connection details, enter the database name, username, password, and localhost for the database server.
(the password is what you set in step 9 and db name is nextcloud db username nextclouduser)
Now You have successfully installed Nextcloud with SSL on your Linux server.
Conclusion
I hope this guide helps you successfully install Nextcloud on your Linux server with Apache and SSL. If you have any questions, feel free to ask using comments thank you.

Getting this error
“This version of Nextcloud requires at least PHP 8.0
You are currently running 7.4.3-4ubuntu2.18. Please update your PHP version.”
Did you follow Step 4?
now its working thanks.
Any fix for The PHP memory limit is below the recommended value of 512MB. ?
sudo nano /etc/php/8.2/apache2/php.iniand find memory_limit then change to 512Msudo systemctl restart apache2