If you want to set up your own TeamSpeak server on a server, this post will show you how to do that.
Table of Contents:
- Step 1: Choose a Server Provider
- Step 2: Update Your Server
- Step 3: Install the Required Packages
- Step 4: Create a new user
- Step 5: Download and Extract the TeamSpeak Server
- Step 6: Accept the License Agreement
- Step 7: Start the TeamSpeak Server
- Step 8: Get Your Server Admin Token
- Step 9: Connect to Your TeamSpeak Server
Step 1: Choose a Server Provider
The first thing you need to do is choose a server provider. There are many providers out there, select one that offers a Linux server (Debian or Ubuntu) with root access.
Step 2: Update Your Server
update your server:
sudo apt-get update
sudo apt-get upgrade
Step 3: Install the Required Packages
Advertisements
install some required packages for the TeamSpeak server:
sudo apt-get install lib32gcc1 wget screenStep 4: Create a new user
It is recommended to create a new user to run the TeamSpeak server. This is for security reasons and to avoid running the server as root:
sudo adduser teamspeakSet a strong password and follow the prompts to create the user.
su - teamspeakLog in to the user
Step 5: Download and Extract the TeamSpeak Server
Now that you’ve installed the required packages, it’s time to download and extract the TeamSpeak server. Run the following commands:
wget https://files.teamspeak-services.com/releases/server/3.13.7/teamspeak3-server_linux_amd64-3.13.7.tar.bz2
tar xvfj teamspeak3-server_linux_amd64-3.13.7.tar.bz2
Note: Make sure to replace “3.13.7” with the latest version number available on the TeamSpeak website.
Step 6: Accept the License Agreement
Before you can start the TeamSpeak server, you need to accept the license agreement:
touch teamspeak3-server_linux_amd64/.ts3server_license_acceptedThis will create a file called .ts3server_license_accepted inside the teamspeak3-server_linux_amd64 directory, to accept the license agreement.
Step 7: Start the TeamSpeak Server
Now that you’ve downloaded and extracted the TeamSpeak server and accepted the license agreement, it’s time to start it using screen:
screen -S ts3servercd teamspeak3-server_linux_amd64./ts3server_startscript.sh startThis will start the TeamSpeak server in a new screen session named “ts3server”. You can detach from the screen session without stopping the server by pressing Ctrl+A followed by D. if you want to reattach screen -r

Step 8: Get Your Server Admin Token
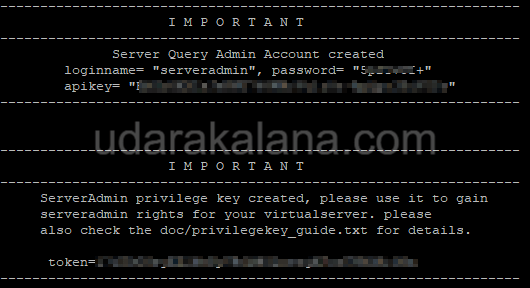
Once the TeamSpeak server is running, you need to get your server admin token. Run the following command:
cat teamspeak3-server_linux_amd64/logs/ts3server_*.log | grep token
This will display your server admin token. Make sure to copy it down as you’ll need it to set up your TeamSpeak server.
Step 9: Connect to Your TeamSpeak Server
Advertisements
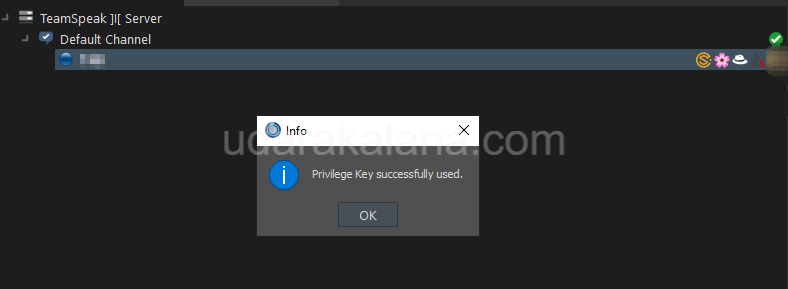
it’s time to connect to it. You can do this by downloading and installing the TeamSpeak client from the TeamSpeak website. Once you’ve installed the client, launch it and connect to your TeamSpeak server by entering the IP address of your server, followed by the port number (9987 by default). When prompted, enter the server admin token you get in step 8.

You’ve successfully installed and set up a TeamSpeak server on your server. Now, you can invite your friends and start chatting! if you have any questions about this post please leave a comment thank you…


